Drywall Repair After Water Damage: A West Chester PA Homeowner's Guide
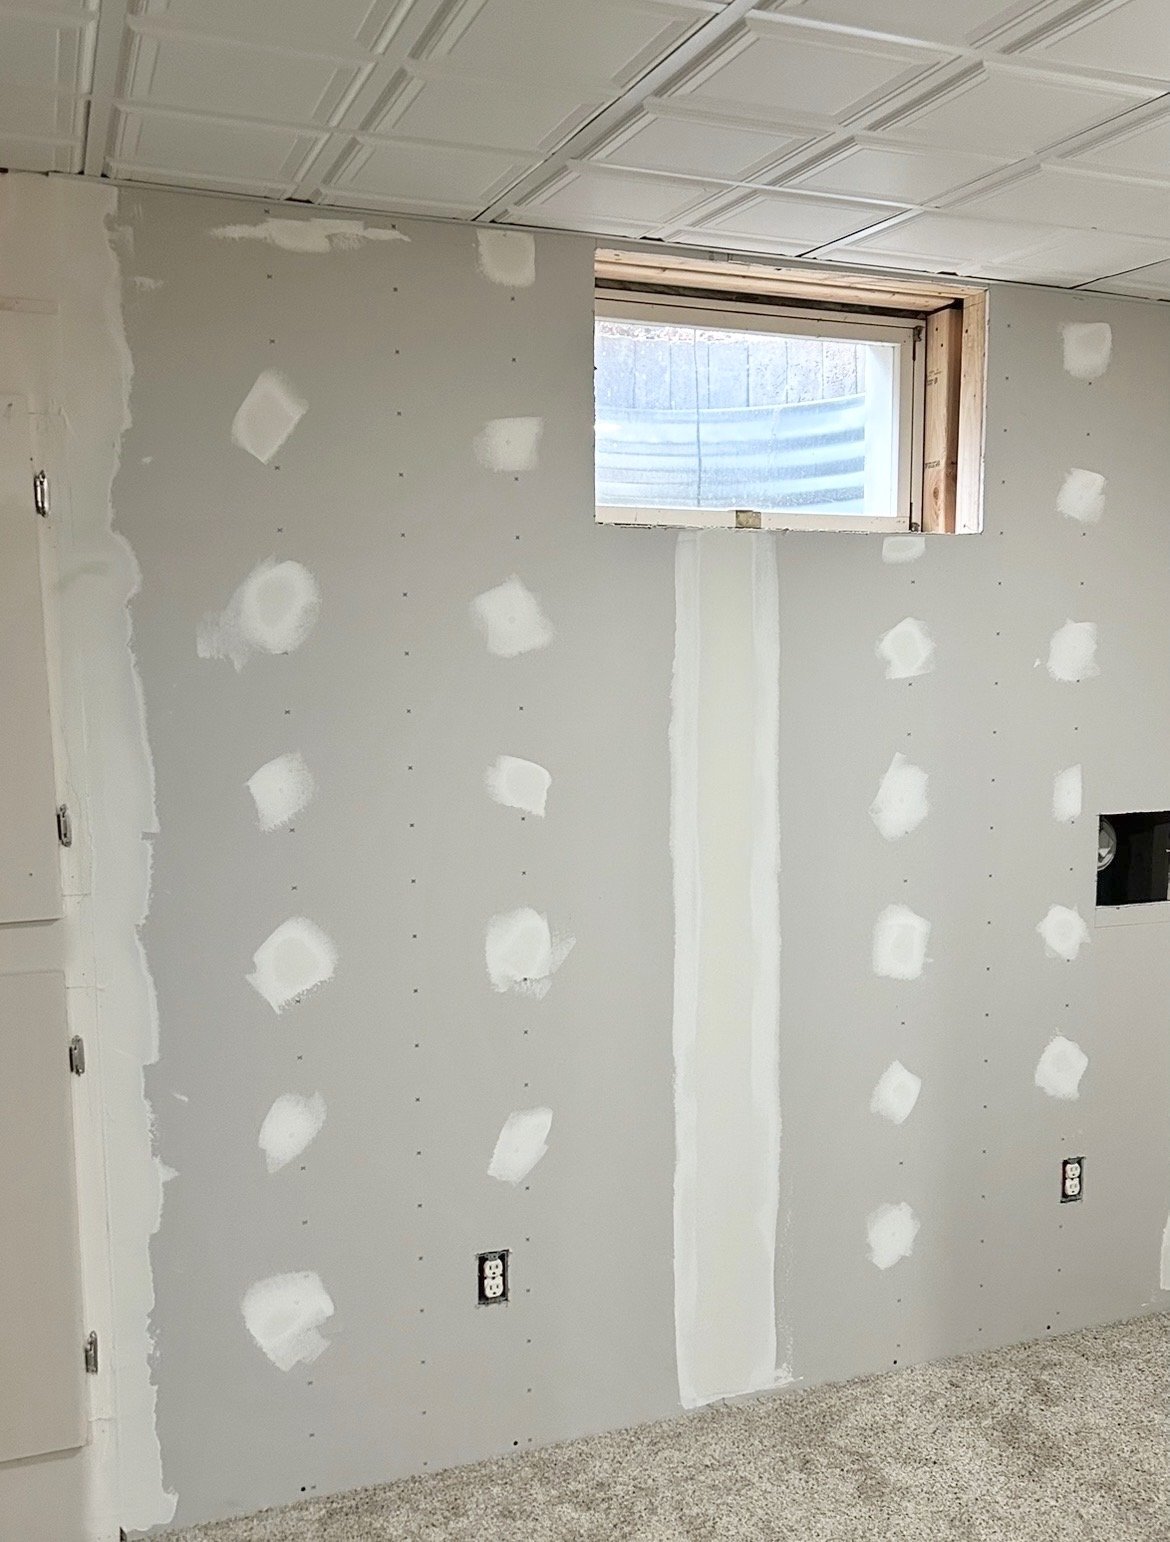
Few things are more stressful than walking into a room and finding water damage on your walls or ceiling. Whether it's a brown stain spreading across your ceiling from an upstairs bathroom leak, a sagging spot after a roof issue, or warped baseboards from a basement flood — the panic is real, and the questions come fast.
Can this be repaired, or does it all need to come out? How much is this going to cost? Is there mold behind there? Do I need a professional or can I patch this myself?
This guide answers those questions in plain English, from the perspective of a licensed West Chester contractor who handles drywall repair after water damage on a regular basis. We'll walk through how to identify water damage, when drywall can be saved versus when it must be replaced, what the repair process actually involves, realistic cost expectations, and when it's time to stop DIYing and call a professional.
If you're standing in front of damaged drywall right now wondering what to do — keep reading.
First Things First: Stop the Water Source
Before any drywall repair conversation makes sense, the water source has to be identified and stopped. Repairing drywall while it's still being exposed to water is like bailing out a boat without plugging the hole. The damage will just come back, often worse than before.
Common water sources we see in West Chester and Chester County homes include:
- Upstairs bathroom leaks — failed shower waterproofing, leaking supply lines, toilet overflows, or tub caulking failures
- Roof leaks — especially common after heavy storms, ice dams in winter, or aging asphalt shingles
- Basement water intrusion — heavy rain, foundation cracks, sump pump failures, or grading issues
- Frozen pipe bursts — typically in unheated spaces during cold snaps
- Appliance leaks — dishwashers, washing machines, refrigerator water lines, water heaters
- HVAC condensation — clogged drain lines, failing evaporator coils, poorly insulated ductwork
Once the source is fixed and the affected area is fully dry — typically 3-7 days with proper airflow and sometimes commercial drying equipment — then drywall repair becomes the right next step.
Signs Your Drywall Has Water Damage
Water damage isn't always obvious right away. Sometimes the only sign is a faint yellow stain. Other times the damage is dramatic — sagging ceilings, crumbling walls, peeling paint. Here's what to look for:
Visible Stains
Yellow, brown, or amber-colored stains on walls or ceilings are the classic sign of water exposure. These stains come from minerals in the water (and sometimes nicotine or other contaminants) being drawn to the drywall surface as it dries.
Bubbling or Peeling Paint
When water gets behind paint, it breaks the bond between the paint and the drywall surface. The result is bubbling, blistering, or peeling — often in patterns that follow the path of the water.
Sagging Sections
This is especially common in ceilings. When drywall absorbs significant water, gravity takes over and the affected section sags downward. Sagging ceiling drywall is a major warning sign — it can collapse if not addressed.
Soft or Mushy Spots
Press gently on suspect areas. Healthy drywall feels firm. Water-damaged drywall feels soft, spongy, or even crumbles under light pressure.
Musty Smell
A persistent musty or earthy smell in a room often means moisture is present somewhere — and where there's hidden moisture, there's often hidden mold.
Visible Mold
Black, green, or white fuzzy growth on drywall is mold. If you see this, the drywall must be replaced — not patched. Mold cannot be reliably "cleaned off" drywall because the spores penetrate deep into the porous material.
Can Water-Damaged Drywall Be Repaired or Does It Need to Be Replaced?
This is the question most homeowners want answered. Here's the honest answer based on what we see in the field:
Drywall That Can Usually Be Repaired
- Small areas with light water exposure that dried out within 24-48 hours
- Cosmetic stains where the drywall itself feels firm and structurally sound
- Surface bubbling or peeling paint over otherwise solid drywall
- Minor edge damage near baseboards from a small leak that was caught quickly
Drywall That Must Be Replaced
- Any drywall that was saturated and stayed wet for more than 48 hours
- Sagging or warped sections (especially ceilings)
- Soft, mushy, or crumbling drywall that fails the press test
- Any drywall with visible mold growth
- Drywall in areas that experienced category 2 or 3 water (gray water from appliances, sewage backups, or floodwater)
The temptation with water damage is always to do as little as possible — patch it, paint over it, hope it's fine. We get it. But trying to "save" drywall that should be replaced is the most common mistake homeowners make after water damage. The result is mold growing inside the wall cavity, structural deterioration, and a repair job that has to be redone (more expensively) within a year.
When in doubt, cut it out and replace it. Drywall is one of the cheapest building materials. The labor to install new drywall is far less expensive than dealing with mold remediation later.
The Drywall Water Damage Repair Process
Here's what a typical drywall repair after water damage looks like when handled by a professional contractor:
Step 1: Assessment
Before any repair work begins, the affected area is inspected to determine the extent of the damage. This includes checking for hidden moisture using a moisture meter, looking inside the wall cavity if possible, and identifying any signs of mold. We also confirm the water source has been fully resolved.
Step 2: Containment and Demo
If significant drywall needs to be removed, the work area is contained with plastic sheeting to prevent dust from spreading throughout the home. Damaged drywall is cut out cleanly — usually back to the nearest stud or to the next full sheet line for clean seams.
Step 3: Address the Wall Cavity
Once the drywall is removed, the cavity behind it can be inspected. Wet insulation must be removed and replaced. Any hidden mold gets treated. Wood framing that was wet should be allowed to dry fully and treated if necessary.
Step 4: New Drywall Installation
New drywall is hung, screwed off properly to studs (every 8-12 inches), and prepped for taping. In moisture-prone areas like bathrooms or basements, moisture-resistant drywall (often called "green board") or cement board is used instead of standard drywall.
Step 5: Taping, Mudding, and Sanding
Seams between sheets are taped, then covered with multiple coats of joint compound (mud). Each coat needs 24 hours to dry before the next is applied. Most professional jobs use 3 coats of mud, with sanding between coats and a final fine sand before painting. This is where the skill of an experienced finisher really shows — the difference between a smooth, invisible repair and a noticeable patch is all in the mud work.
Step 6: Texture Matching
If your existing walls or ceilings have texture (orange peel, knockdown, popcorn, etc.), the new drywall needs to be textured to match. This is one of the trickiest parts of drywall repair — mismatched texture is the dead giveaway of an amateur job.
Step 7: Priming and Painting
Stain-blocking primer is critical for water-damaged areas, even if you're replacing the drywall entirely. Without it, water stains can sometimes bleed through new paint. Once primed, the area is painted to match the surrounding walls — which often requires repainting the entire wall or ceiling for a seamless look.
Step 8: Final Cleanup
The work area is cleaned, plastic containment is removed, and a final walkthrough confirms everything looks right. Done well, you shouldn't be able to tell where the repair was.
How Much Does Drywall Repair After Water Damage Cost?
Costs vary significantly based on the size of the damaged area, accessibility, texture matching difficulty, and whether the wall cavity needs work:
Small Patch / Stain Coverup
$300 – $600
Minor damage in a single area, simple texture, basic paint touchup.
Section Replacement (4x8 sheet area)
$500 – $1,500
Cutting out and replacing a section of damaged ceiling or wall drywall, including mud, sand, prime, paint.
Multi-Sheet or Whole Room
$1,500 – $5,000+
Larger repairs involving multiple sheets, full ceiling replacement, or repairs across multiple rooms with full paint integration.
These ranges assume the water source is already fixed and the area is dry before drywall work begins. Significant water events affecting framing, insulation, flooring, or trim can add to the total cost. Larger water damage projects involving multiple rooms, ceilings, walls, and flooring fall into a separate scope.
How Long Does Drywall Repair After Water Damage Take?
The active work moves faster than you might think — but the dry times between mud coats stretch the total timeline:
- Small patch: 4-7 days total (1-2 days active work, 3-5 days for mud drying, sanding, and paint)
- Section replacement: 5-10 days total
- Multi-sheet or whole room: 1-2 weeks total
- Major water event (multiple rooms): 2-4 weeks total
The mud drying time can't be rushed. Three coats of joint compound applied properly need their full dry time, or the finish will crack, shrink, or show through paint within months. Anyone telling you they can finish a drywall repair "in a day" is cutting corners on the most important step.
Common Water Damage Situations We See in West Chester
Upstairs Bathroom Leak Causing Ceiling Damage
This is by far the most common drywall water damage scenario. A failed shower pan, leaking supply line, toilet wax ring failure, or worn-out tub caulking allows water to slowly drip into the ceiling cavity below — usually showing up as a yellow stain on the kitchen, living room, or hallway ceiling. By the time the stain appears, water has typically been leaking for weeks or months.
Roof Leak After Heavy Storm
Chester County's mix of heavy summer storms, winter ice dams, and aging shingles makes roof leaks a regular occurrence. The drywall damage usually shows up on top-floor ceilings or around chimneys, skylights, and roof penetrations.
Basement Drywall Damage from Flooding or Moisture
Older West Chester basements are notoriously prone to moisture issues. Drywall in finished basements often shows damage along the bottom edges from minor flooding, or larger sections after a major water event. Basement drywall repair almost always requires replacement (not patching) because of mold risk.
Frozen Pipe Burst
Cold snaps cause pipes in unheated areas — exterior walls, attics, garages, crawl spaces — to freeze and burst. The resulting water damage can affect multiple walls and ceilings as water travels through the structure.
Plumbing Leak Behind a Wall
Slow plumbing leaks behind walls can cause significant damage before they're noticed. Common signs include a musty smell, paint discoloration, or warm spots (from hot water lines) on the wall surface.
Should You Repair Water-Damaged Drywall Yourself?
An honest take: small cosmetic patches are doable for a confident DIYer with basic tools and a few YouTube tutorials. Stain blocker primer, a small piece of replacement drywall, mud, tape, sandpaper, and paint can handle a 4-inch hole or a small stained section.
But beyond a small patch, drywall repair gets technical fast. The mistakes we see most often when homeowners attempt their own water damage repairs:
- Not addressing hidden moisture or mold behind the visible damage, leading to bigger problems later
- Painting over stains without proper primer, which causes the stain to bleed through within weeks
- Mismatched texture that's obvious in any kind of side lighting
- Visible seams or "frame and panel" effect from improper taping and mudding
- Cracking or shrinking within months due to rushed mud drying
- Patches that show through paint due to flashing differences in texture and absorption
Ceiling repairs are particularly tricky for homeowners because everything has to be done overhead, gravity works against you during mudding, and ceiling textures (especially knockdown and popcorn) are very hard to match without practice.
When in doubt, get a quote from a local contractor before starting. Many homeowners assume the cost will be high, then are surprised to find that a professional repair is actually competitive with the cost of buying tools, materials, and supplies for a DIY job — especially when you factor in the value of your time and the risk of a redo.
When to Call a Professional Contractor
Call a professional for drywall repair after water damage when:
- The damage covers more than a few square feet
- There's any sagging, warping, or structural concern
- Ceiling damage is involved (especially anything above your head you'd be working on)
- You suspect mold may be present
- The wall has texture that's hard to match (knockdown, orange peel, popcorn)
- You're planning to sell the home soon — buyers and inspectors easily spot amateur drywall work
- You don't have experience with mud, taping, and texture work
- The water damage came from a category 2 or 3 source (gray or black water)
A licensed contractor will inspect the full scope of damage (including hidden moisture), execute the repair correctly, and integrate the patch into the surrounding walls so it's invisible. The peace of mind is worth a lot when it comes to water damage — done right, you'll never know it was there.
Why Hire a Licensed Contractor for Water Damage Drywall Repair?
In Pennsylvania, home improvement work over $500 requires HICPA registration (Pennsylvania Home Improvement Contractor registration). Beyond legal compliance, hiring a licensed contractor for drywall water damage repair gives you:
Proper assessment. A licensed contractor knows how to identify hidden moisture, evaluate framing and insulation behind the damaged area, and recognize when there's a bigger underlying issue that needs to be addressed before the repair begins.
Quality work that lasts. Mud, taping, and finishing are skills that take years to develop. A professional finish will be invisible. An amateur finish will be visible forever, especially in raking light.
Insurance and accountability. Licensed contractors carry general liability insurance and stand behind their work in writing. If a problem develops, you have recourse.
Permits when required. Some larger water damage repairs trigger permit requirements, especially if structural elements are affected. A licensed contractor handles this for you.
One contractor for the whole project. Water damage often involves more than just drywall — it might also include trim, paint, flooring, or fixture replacements. A full-service home improvement contractor can handle the entire repair as a single project rather than coordinating multiple trades yourself.
Frequently Asked Questions
How soon after water damage should I start drywall repair?
Wait until the area is fully dry — typically 3-7 days after the water source is fixed. Starting drywall repair on still-wet substrates traps moisture inside the wall and creates conditions for mold growth.
Will my homeowners insurance cover drywall repair from water damage?
Coverage depends on your policy and the cause of damage. Sudden, accidental events (pipe bursts, appliance failures) are often covered. Gradual leaks, flooding from heavy rain, or maintenance issues are typically not covered. Always check with your insurance provider.
Can painted drywall water stains be covered without replacing the drywall?
Sometimes, yes — if the drywall itself is structurally sound and not soft or moldy. The key is using a proper stain-blocking primer (like Kilz or Zinsser BIN) before repainting. Without primer, water stains will bleed through new paint.
Is it normal to find mold behind water-damaged drywall?
It's common. Any drywall that stayed wet for more than 24-48 hours has a real risk of mold growth in the wall cavity, even if you don't see it on the surface. This is why "patching over" significant water damage almost always backfires.
How do I prevent drywall water damage in the future?
Inspect bathroom caulking and grout annually. Replace washing machine and dishwasher supply lines every 5-7 years. Keep gutters clean and downspouts directed away from the foundation. Insulate pipes in unheated areas before winter. Test sump pumps regularly. Most water damage comes from preventable issues caught too late.
Can I just paint over water-damaged drywall?
If the drywall is structurally sound, properly dried, and free of mold, you can prime with stain blocker and paint. But if the drywall is soft, sagging, or has mold, painting over it just hides the problem temporarily — it will come back through your paint within months.
Final Thoughts
Drywall repair after water damage is a project where shortcuts almost always come back to haunt you. The cosmetic patch that hides hidden moisture. The repair that skips primer and bleeds stains through new paint. The DIY texture that looks fine in normal light but glares in raking sunlight. The mold that grows in the cavity behind a "fixed" wall.
Done correctly — with proper assessment, full removal of damaged material, attention to the wall cavity, quality mud work, accurate texture matching, and proper primer — drywall repair becomes invisible. The room looks like nothing ever happened. That's the goal.
If you're dealing with water-damaged drywall in your West Chester or Chester County home and you're not sure whether it's a small patch job or a bigger repair, we're happy to take a look and give you an honest assessment. Sometimes it's smaller than you think. Sometimes it's bigger. Either way, you'll know what you're dealing with.
Need Drywall Repair After Water Damage?
Schedule an in-home assessment and get an honest scope and estimate for your project. Licensed, insured, and proudly serving West Chester and all of Chester County.
Request an Estimate